

Smart Thermostat Installation Cost: 2026 Pricing Guide

Professional smart thermostat installation in the U.S. typically runs $200 to $500, with a common average near $350. The bill can climb or shrink fast depending on wiring, HVAC compatibility, labor time, and whether the home already has a C-wire.
That's why two neighbors can buy similar thermostats and still end up with very different receipts. One pays for a simple swap. The other pays for adapters, extra wiring, or a technician who has to solve an older system before the thermostat can even power up.
Table of Contents
- What Smart Thermostat Installation Actually Costs You
- The Five Cost Drivers Behind Every Smart Thermostat Install
- DIY vs Professional Installation Compared
- What Happens During a Professional Installation
- Regional Price Differences Between the U.S. and the U.K.
- Rebates, Tax Credits, and Other Ways to Lower the Bill
- Two Sample Cost Breakdowns for Real Homes
- Smart Thermostat Installation FAQ and Next Steps
What Smart Thermostat Installation Actually Costs You
A smart thermostat looks like a small upgrade, but the total project is more like buying a phone and then paying separately for the case, screen protector, setup, and data transfer. The thermostat itself is only one piece of the bill. The rest comes from the work needed to make it fit the home's wiring, HVAC system, and controls.
That's why the smart thermostat installation cost can feel confusing at first. A homeowner may see a thermostat priced at $130 and expect a quick swap, then get a quote that lands near $500 once labor and wiring are added. Another homeowner may buy a $300 model for a home that already has compatible wiring and end up with the cheaper all-in project.
Practical rule: the installed price usually matters more than the sticker price on the box. A lower-cost thermostat can become the more expensive project if the wall behind it needs extra work.
The broad market picture supports that pattern. Professional smart thermostat installation in the U.S. typically costs about $200 to $500, with a commonly cited average near $350 and broader estimates reaching $175 to $1,000 depending on wiring, brand, and technician type, according to HomeAdvisor's cost guide. That spread is wide because installation is not a single task. It often includes device setup, compatibility checks, and extra labor on older HVAC systems.
The rest of this guide breaks that bill into plain English so the quote makes sense before anyone signs it. For a related home-upgrade example, see smart lock installation cost.
The Five Cost Drivers Behind Every Smart Thermostat Install
A smart thermostat quote usually looks simple on the surface, then the details start to separate one project from another. The device on the wall is only one part of the bill. The rest comes from the wiring behind it, the HVAC equipment it has to speak to, and the amount of correction needed to make everything work together.
That is why the smart thermostat installation cost can seem inconsistent at first. One homeowner may buy a thermostat for $130 and assume the job will be quick, then see the estimate rise toward $500 once labor and wiring work are included. Another homeowner may choose a $300 model for a house that already has the right wiring and end up with the lower all-in price.
Practical rule: the installed price usually matters more than the sticker price on the box. A cheaper thermostat can turn into the costlier project if the wall behind it needs extra work.
The broad market numbers follow that pattern. Professional smart thermostat installation in the U.S. typically falls around $200 to $500, with a commonly cited average near $350 and wider estimates reaching $175 to $1,000 depending on wiring, brand, and technician type. HomeGuide and Nearby Hunt both show how much the final bill can shift once the job moves beyond a basic swap. The range is wide because installation is more like fitting a key to a lock than replacing a simple wall plate. Compatibility matters.
The five cost drivers below explain where the money goes, and which ones usually decide whether the project stays near the low end or climbs much higher.
1. Device price
The thermostat itself is the most visible line on the receipt, but it is rarely the whole story. Guides that track smart thermostat pricing put the unit alone around $50 to $350, while the installed total often lands much higher once labor and wiring are added. A mid-range model in a home that is already wired for it can still be the better buy because fewer corrections are needed.
2. Labor
Labor usually starts as the simplest part to understand. It is commonly quoted at $50 to $150 per hour, and many installs take about 30 minutes to 3 hours, which is why the total can rise quickly when the job turns into more than a direct replacement. Design Transition Studio and EcoTemp HVAC's breakdown show the same basic pattern, a clean replacement on a simple system sits at one end of the range, while a complicated retrofit sits at the other.
The person doing the work also matters. A quick swap with clear labeling and easy access takes less time than a visit that includes troubleshooting, testing, and setup across multiple pieces of equipment.
3. Wiring and C-wire work
The C-wire is the part many homeowners miss until the quote arrives. It supplies continuous power, so a smart thermostat can stay on without stealing power from the heating or cooling circuit. If the home does not already have one, the extra cost for an adapter or wiring work is often around $50 to $150, and some older homes need more work if rewiring or wall repair is involved, according to Design Transition Studio and HomeGuide. That is why an older home can stop being a simple thermostat replacement and turn into a wiring project.
The price gap is often hidden in the wall, not on the product page.
4. HVAC compatibility upgrades
Some homes need more than a thermostat swap. Multi-zone systems, older furnaces, heat pumps, and older control boards may call for extra setup or adjustment before the thermostat can communicate correctly with the system. That added work takes time, and time adds cost.
This is also where buyers can get surprised. A thermostat that looks compatible on the box may still need balancing, configuration changes, or additional parts once the technician opens the system and checks how it is wired.
5. Add-ons and corrections
Small corrections can stack up fast. Adapters, electrical work, and minor repairs can all add to the final amount, especially in older homes where the wall setup is not ready for a smart device. Nearby Hunt notes that homes without a C-wire may need an adapter or professional wiring work, and those add-ons can push the total higher when the existing setup is not straightforward.
That is also where a related home upgrade can help set expectations. For a similar breakdown of how labor, hardware, and site conditions affect a project total, see smart lock installation cost.
| Cost Driver | Typical Range | Why It Matters |
|---|---|---|
| Device price | $50 to $350 | Sets the starting point, but rarely decides the final bill |
| Labor | $50 to $150 per hour | Time on site drives the install total |
| C-wire work | $50 to $150, sometimes more | Missing wiring often turns a simple swap into a retrofit |
| Compatibility upgrades | Varies by system | Older or multi-zone HVAC systems can add setup time |
| Add-ons and corrections | Small to substantial | Adapters, wiring fixes, and repairs can push the total higher |
DIY vs Professional Installation Compared
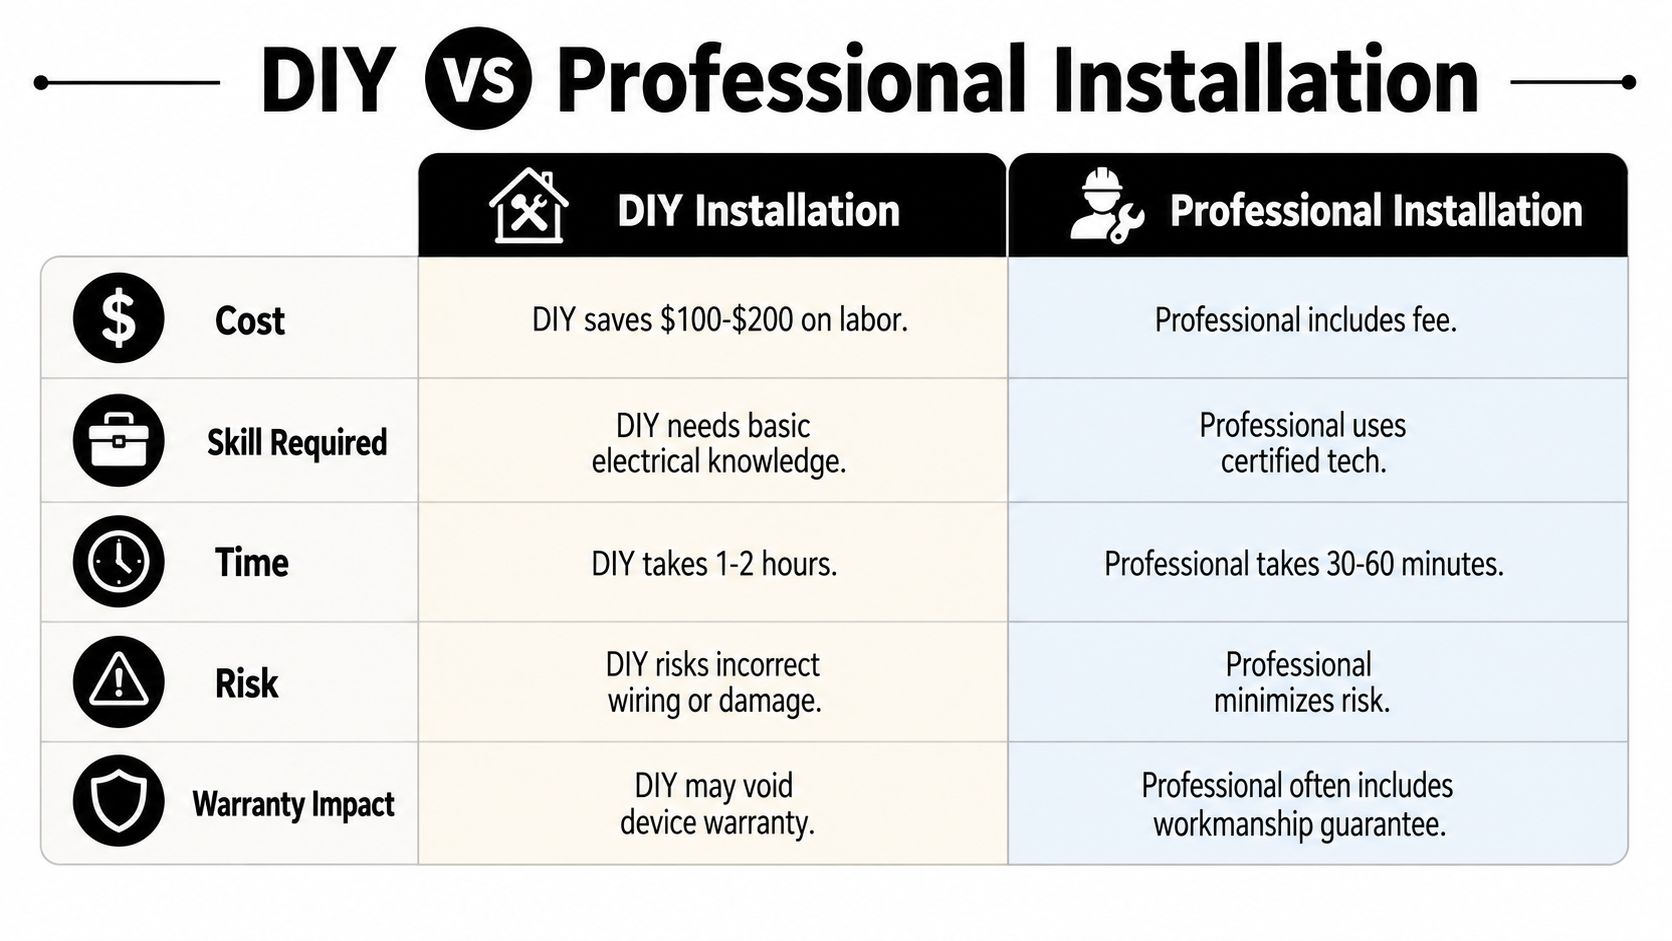
A thermostat swap can look simple on paper, then turn complicated once the wall plate comes off. DIY makes sense when the wiring is already labeled, the new thermostat matches the old setup, and the home already has a C-wire in place. In that kind of project, the main savings come from skipping labor, and the work is mostly careful follow-through rather than problem-solving.
Professional installation is a better fit when the system is older, the wiring is hard to read, or the home has more than one zone. Those are the jobs where a small wiring mistake can leave you with no heat or no cool, which is a frustrating way to save a little money. The same idea applies to smart door lock installation, where the device itself is only part of the job and the existing setup decides how much work is really involved.
Side-by-side decision factors
| Factor | DIY Installation | Professional Installation |
|---|---|---|
| Cost | Lowest upfront cost if the home is compatible | Higher upfront cost, but labor is included |
| Skill required | Basic electrical knowledge and patience | Certified technician handles the wiring and setup |
| Time | Usually slower for first-time owners | Usually faster and more predictable |
| Risk | Higher risk of incorrect wiring or damage | Lower risk because the technician verifies the system |
| Warranty impact | May affect device warranty or workmanship coverage | Often includes workmanship protection |
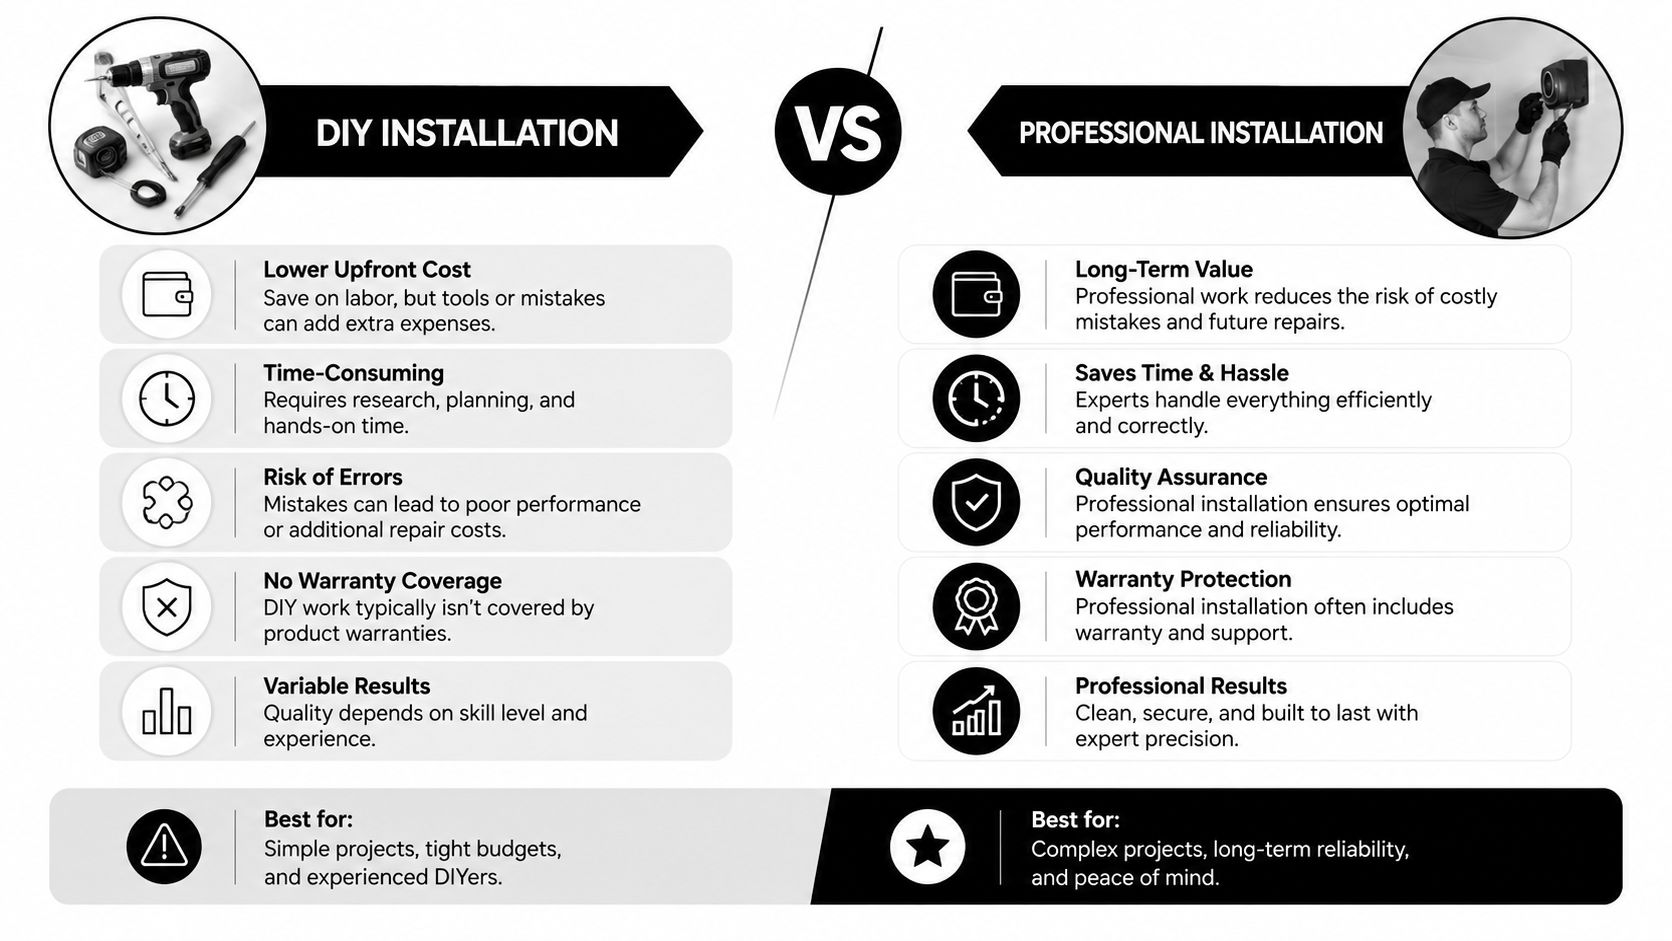
The decision usually comes down to how predictable the wall behind the thermostat is. If the system is straightforward and clearly compatible, DIY can keep the bill lower. If the home is older, the wiring is unclear, or the thermostat needs adapter work, hiring a pro reduces the chance of turning a small upgrade into a repair call.
What Happens During a Professional Installation
A professional install usually starts with a compatibility check, and that is where the work gets more precise than a simple swap. The technician looks at the HVAC system, the existing wiring, and the thermostat model together, because all three have to line up before the new unit can do its job. That early review helps keep a homeowner from buying hardware that cannot work with the system on the wall.
Once compatibility looks right, the installer shuts off power at the HVAC equipment and removes the old thermostat carefully. Each wire gets labeled before anything is disconnected, since one crossed wire can stop the system from calling for heat or cool in the right way. After that, the new base is mounted, the wires are attached, and the thermostat is fastened in place.
A good technician also checks the setup behind the scenes, not just the finished look.
What a competent technician usually verifies
- Voltage and power safety: The technician confirms the wiring is safe before the new thermostat is connected.
- C-wire presence: If the home does not have a C-wire, the installer decides whether an adapter or extra wiring work is needed.
- System response: The thermostat is tested to make sure the HVAC system responds properly in both heat and cool modes.
- Wi-Fi and app setup: The device is added to the network and paired with the app.
- Final review: The installer walks through the settings so the homeowner knows how to use the thermostat without guessing.
Labor time helps explain why professional quotes can vary so much. Installers often charge $50 to $150 per hour, and the job may take 30 minutes to 3 hours, depending on how tidy the wiring looks and whether the old thermostat has to be reconfigured, according to EcoTemp HVAC. A straightforward replacement is one thing. An older control setup with unclear wiring or a missing C-wire can take much longer.
A fair quote should name more than the thermostat model. It should also say what happens if the wiring needs adjustment.
That is what separates a basic install from a real service visit. The fee covers setup, testing, and the part many homeowners should not guess at, the wiring logic behind the wall.
Regional Price Differences Between the U.S. and the U.K.
A smart thermostat can look identical in a shopping cart, then cost very different amounts to install once a technician opens the wall. That gap usually comes from local labor rates, how homes are wired, and how often the installer runs into extra setup work.
In the U.S., professional smart thermostat installation often falls around $200 to $500, with many quotes landing near $300 to $350, according to HomeAdvisor and related pricing guides. In the U.K., current guides place the typical range around £160 to £370, with an average near £265 and fixed labor often £80 to £150, according to Yell's pricing guide.
| Market | Typical Install Range | Average | Typical Fixed Labor |
|---|---|---|---|
| U.S. | $200 to $500 | About $300 to $350 | Varies by installer and complexity |
| U.K. | £160 to £370 | About £265 | £80 to £150 |
That difference matters because the thermostat itself is only part of the bill. The comparison is not just device price against device price, it is device price plus the labor needed to make the system talk to the thermostat correctly.
A simple replacement can stay near the lower end of the range. Once the wiring is older, the setup includes more than one heating zone, or the installer has to sort out a C-wire issue, the quote can rise quickly. Regional pricing guides also show that very basic jobs can be much cheaper, while more complex systems can climb far higher, depending on the home and the controls already in place.
For homeowners trying to compare quotes across markets, a useful way to read the numbers is to separate hardware from installation logic. Smart thermostat cost is often tied to the same decision tree as broader smart home energy management, because the price rises when the existing system needs more than a simple swap.
Rebates, Tax Credits, and Other Ways to Lower the Bill
A smart thermostat can cost less on paper than it does in real life if the installer has to fix wiring, add an adapter, or troubleshoot an older HVAC setup. The cheapest quote is usually the one that starts with a compatibility check, especially for C-wire compatibility. That check works like looking under the hood before buying a car. It does not change the sticker price, but it can keep a small project from turning into a costly repair visit.
Rebates can soften the blow when the thermostat qualifies as an ENERGY STAR smart thermostat. Some utilities offer bill credits or rebates, and tax credits may be available in some places depending on local rules. Manufacturers also run promotions that bundle installation with purchase, which can lower the upfront total if the offer fits the home and the equipment. Homeowners still need to read the current terms carefully, because these programs change and the fine print decides whether the savings apply.
Simple ways to keep the install lean
- Check compatibility first: Match the thermostat to the existing system before checkout.
- Ask about bundled service: Some sellers include installation with purchase.
- Schedule during slower seasons: Installers may have more openings when heating and cooling demand is lower.
- Combine small jobs: Pairing thermostat work with another electrical visit can reduce the minimum service charge.
- Choose a model that fits the wiring: A compatible thermostat can cost less overall than a cheaper unit that needs more labor.
The savings side matters too. The U.S. Department of Energy says homeowners can save up to 10% a year by adjusting the thermostat 7 to 10°F for 8 hours a day, and many smart models automate that schedule, according to Trane's summary of DOE guidance. That turns the install into more than a one-time expense. It becomes part of a home's routine energy strategy, especially when the thermostat is paired with broader smart home energy management tools.
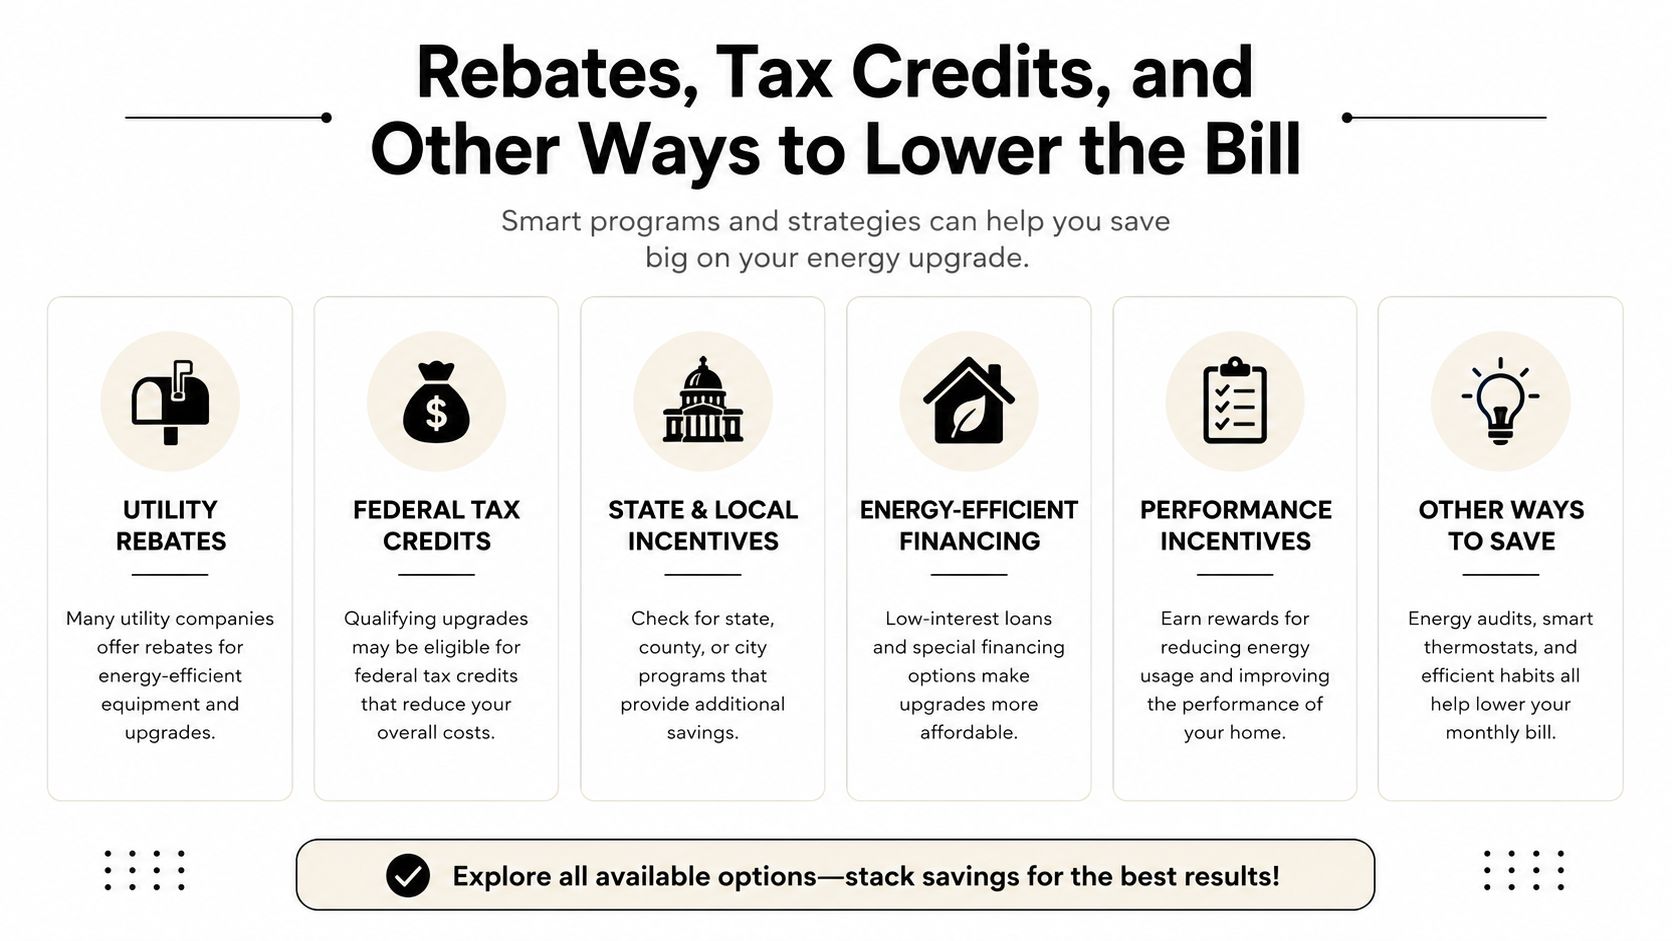
The practical lesson is simple. A lower install bill usually comes from preventing extra labor, not from chasing the lowest thermostat price alone. A homeowner who checks wiring, asks about rebates, and compares the full service quote line by line has a much better chance of keeping the project on budget.
Two Sample Cost Breakdowns for Real Homes
A newer home with a C-wire usually keeps the budget easier to predict. A mid-range thermostat might still sit around $200, but the installation itself is more likely to stay close to the lower end of a normal service visit because the wiring already matches what the thermostat needs. In that kind of setup, the final total can land around $325, depending on the exact device and the quote from the installer.
A house built before 2000 can look similar from the outside and still cost much more to upgrade. If there is no C-wire, the HVAC system has multiple zones, and the job needs an adapter plus extra wiring work, the total can push past $700. The thermostat price may stay modest, but the labor changes the picture quickly, because the installer is no longer just hanging a device on the wall, they are solving a wiring problem too.
| Scenario | Main Line Items | Why the Cost Moves |
|---|---|---|
| Newer home with C-wire | Mid-range thermostat, short install visit, basic setup | Compatibility is already in place |
| Older home with no C-wire | Thermostat, adapter or wiring work, longer labor, possible electrical follow-up | Retrofit work adds time and materials |
A useful way to read these examples is to separate the device from the labor. The thermostat itself is only one part of the bill, like buying a faucet without counting the plumbing work needed to fit it to the sink. In a ready-made setup, the labor stays light. In a retrofit, the installer may need to open up the wall, test the system, or handle extra wiring steps before the thermostat even powers on.
That is why two homes can buy a similar smart thermostat and end up in very different price ranges. The wall behind the old thermostat matters as much as the model in the box.
A homeowner who wants the lower total should first match the thermostat to the existing wiring. A homeowner with older equipment should budget for the hidden work first, then choose the thermostat second. That order keeps the final number from turning into a surprise.
Smart Thermostat Installation FAQ and Next Steps
How long does installation take? The time can range from a quick wall swap to a longer visit, because wiring, system checks, and setup all affect the pace. A straightforward job may finish in well under an hour, while a more complicated one can take several hours if the installer has to sort out compatibility or make wiring changes.
Do old mercury thermostats need special handling? Yes. They should be removed carefully because the system behind them may be older and less standardized. Professional removal lowers the chance of damaging fragile wiring or running into a setup that does not match modern thermostat terminals.
What if the HVAC system turns out to be incompatible mid-install? The installer may need an adapter, new wiring, or a different thermostat model. That is the point where a basic install starts to look more like a retrofit, because the work shifts from mounting a device to solving a wiring problem.
Do smart thermostats work with heat pumps and multi-stage systems? Many do, but compatibility has to be checked before purchase. The thermostat only works properly if its wiring and control logic match the HVAC system, so the model in the box matters less than the system it has to speak to.
The cleanest next step is to compare the quote with the home's wiring before buying the device. That keeps the budget tied to the actual project, not just the sticker price on the thermostat.
A homeowner with newer wiring can often focus on the thermostat model and installation fee. A homeowner with older equipment should check for the C-wire question, adapter costs, and any extra labor before making a final choice. That order helps prevent the bill from turning into a surprise halfway through the job.
Granted Solutions offers practical home and gadget finds that make everyday upgrades easier to plan and easier to give as gifts. If a smart thermostat is only one piece of a broader home-improvement plan, visit Granted Solutions to explore useful, problem-solving products that fit real budgets and real homes.
Leave a comment